Last week Alex and I were busy raking leaves (of course it was a day before the wind rolled in...) and I made a trip to Bachman's Nursery. If you don't know about Bachman's here is a little free promo. First of all, it is a local, family owned business here in Minneapolis, which I love. It also gets mad props in my book for being super super creative. They have this house (that I think maybe the Bachman family grew up in at one point?) that is called the Idea House. Love it!! I think I need to refer to my house as the "Idea house" ;-) The house is basically like a real live version of Pinterest!! They decorate and furnish it about 4-5 times a year and have the most creative, beautiful ideas. I am always so inspired.
I found a blog that posts about the Idea House, Itsy Bits and Pieces, and here are some photos from the fall 2013 house that my mom and I just saw.
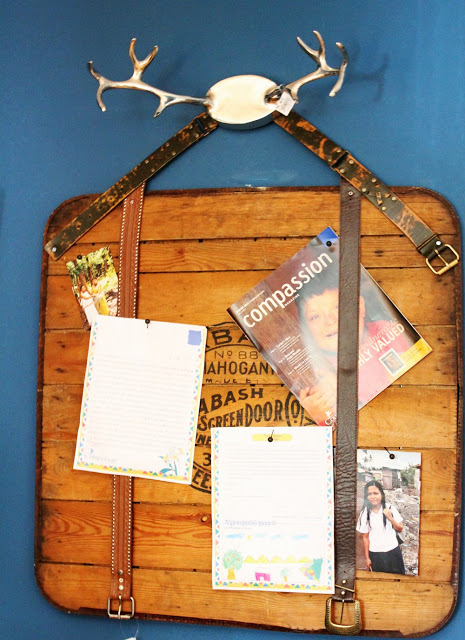
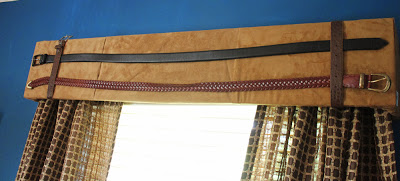
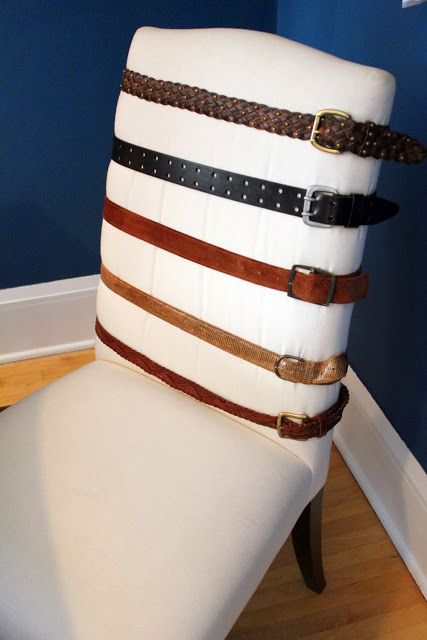
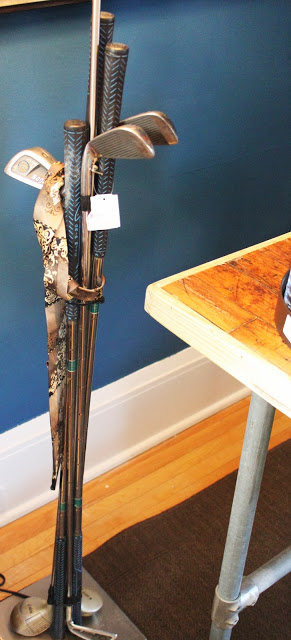
The office was decorated very "manly" and there was a belt theme!
I found a blog that posts about the Idea House, Itsy Bits and Pieces, and here are some photos from the fall 2013 house that my mom and I just saw.
The office was decorated very "manly" and there was a belt theme!
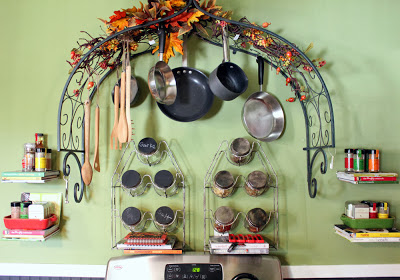
And here are some shots from the kitchen. Lot's of vintage inspiration here! My favorite part of the whole house this fall was the metal ironing board (minus the clock). It's magnetic, has holes for clips... I am thinking craft room!!!


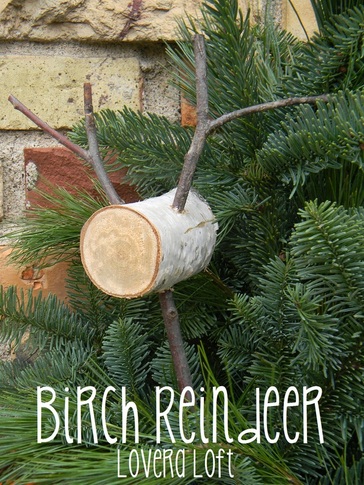
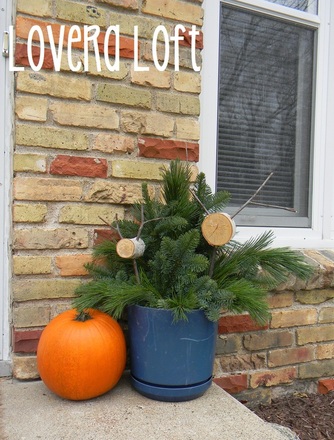
So, back to my original post, last weekend I saw the cutest reindeer decorations at Bachman's and decided that instead of paying $12.99 a piece, I could make my own. I did buy the birch branches and spruce tops... so I don't feel too guilty about stealing the idea. ;-)
I didn't take any tutorial pictures, but I will try and explain what I did:
Materials:
-birch log
-sticks
-saw
-drill
-wood glue
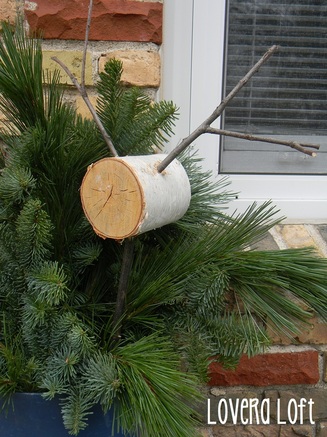
How To:
1. Cut the head pieces. I used our table saw. About 4" long.
2. Cut some sticks for the bases and antlers.
3. Widdle (is that a word?) the ends of the sticks with a knife to make them a bit thinner on the ends that will go into the birch head.
4. Use a drill to drill holes into the birch head for the base stick and antlers. I used a larger drill bit for the base stick as it was a little thicker than the antlers.
5. Cover the widdled ends of the sticks with some wood glue and push into the holes you drilled in the birch head. Let dry and you are done!
I didn't take any tutorial pictures, but I will try and explain what I did:
Materials:
-birch log
-sticks
-saw
-drill
-wood glue
How To:
1. Cut the head pieces. I used our table saw. About 4" long.
2. Cut some sticks for the bases and antlers.
3. Widdle (is that a word?) the ends of the sticks with a knife to make them a bit thinner on the ends that will go into the birch head.
4. Use a drill to drill holes into the birch head for the base stick and antlers. I used a larger drill bit for the base stick as it was a little thicker than the antlers.
5. Cover the widdled ends of the sticks with some wood glue and push into the holes you drilled in the birch head. Let dry and you are done!

There were also some full standing reindeer and birch snowmen too that I might try... stay tuned!

 RSS Feed