
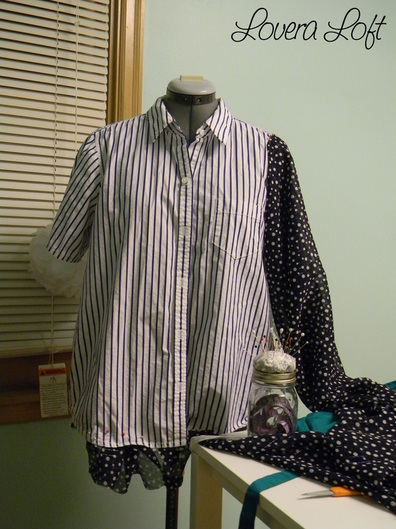
So, I had some left over fun polka dot chiffon fabric from a shirt that I made for my bestie (that only took me like 7 months to do...sorry Ang, it's done now, so come get it!!) And I wanted to use it, but it was a smaller piece so I couldn't make a whole other shirt, so I started "draping" like they do on Project Runway and came up with using it as sleeves! I love my dress form for this very reason-- it really helps with creativity and makes me feel so professional! ;-) As you can see below I also considered adding a little ruffle on the bottom, but didn't in the end.
So here is what I did:
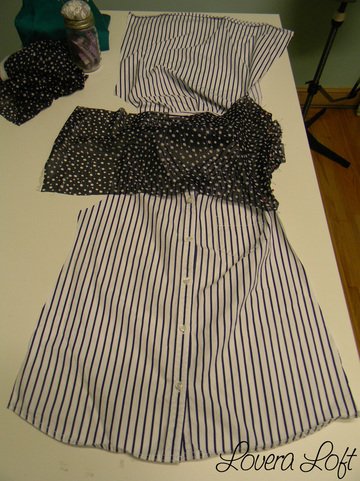
1. Cut off sleeves (including the seams).
1. Cut off sleeves (including the seams).
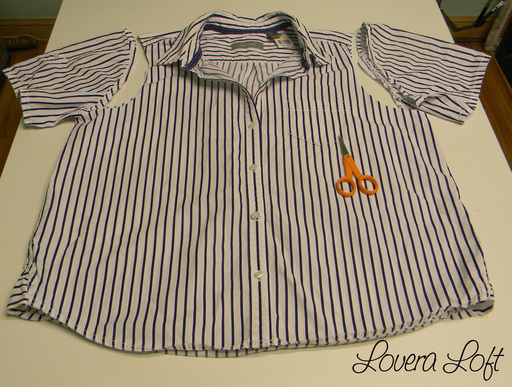
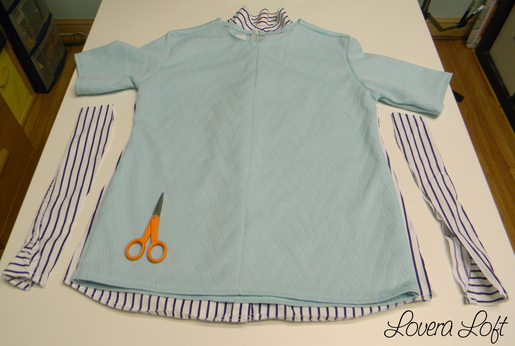
2. Find an existing shirt (this is one I made that I still haven't posted about yet, sorry). The striped shirt wasn't very stretchy, so I found one to trace that was also non-stretch. Lay the one to trace on top and trim the sides, leaving about 1/2" for seam allowance.
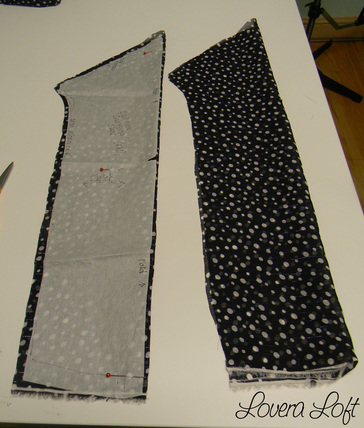
3. Next, cut out sleeves out of some fun chiffony fabric! I used a tissue paper pattern that I made from a sweatshirt. You can see it in this post. I cut the sleeves so that the bottoms are the salvaged edges so that I wouldn't have to hem them.....artistic or lazy? ;-)
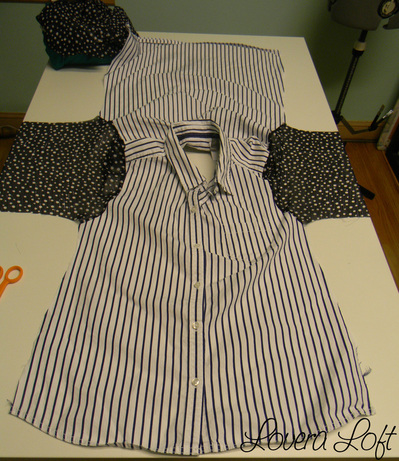
4. Open up the shirt and lay it right side up.
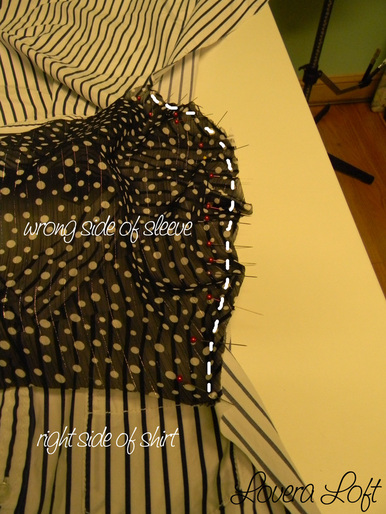
5. Take one sleeve and pin it, right side down, to the arm hole of the shirt. Pin and sew a straight stitch. I probably should have used a zig zag stitch on the edge as well to help with fraying, but I haven't done that yet.
5. Take one sleeve and pin it, right side down, to the arm hole of the shirt. Pin and sew a straight stitch. I probably should have used a zig zag stitch on the edge as well to help with fraying, but I haven't done that yet.
Now, my sleeve was a little longer than the opening, so I made one "pleat" at the top of the shoulder, which actually looks kinda cute!
Here is a closer look:
Here is a closer look:
6. Repeat with the other sleeve. The picture below is what it should look like after sewing both sleeves on:
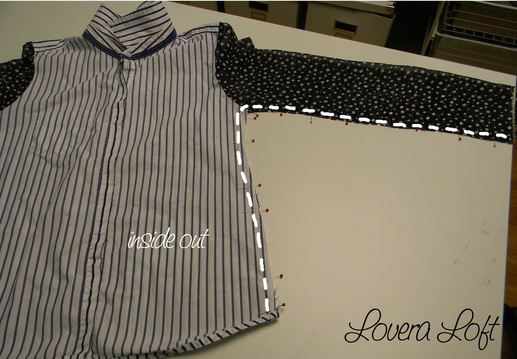
7. Turn the shirt right sides together. Pin and sew using a straight stitch up the side seams and down the arm. Again, you should probably also sew a zig zag stitch along the raw edge to minimize fraying.
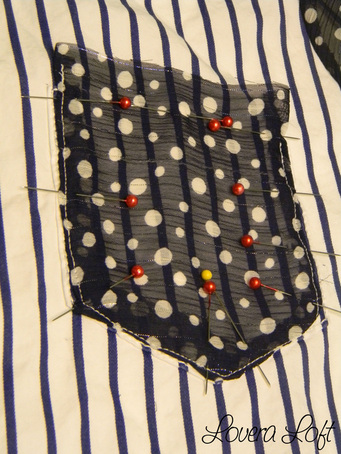
Now, I decided to add a little bit of the polka dot fabric to the pocket as well. I couldn't decide if I should do the pocket or a ruffle on the bottom, but I chose the pocket.
8. Lay the fabric over the pocket and cut about 1/2" wider than the original pocket. Fold the edges under and machine stitch around both sides and bottom of the pocket right to the shirt. Then, hand stitch the top down so that the pocket can still open.
8. Lay the fabric over the pocket and cut about 1/2" wider than the original pocket. Fold the edges under and machine stitch around both sides and bottom of the pocket right to the shirt. Then, hand stitch the top down so that the pocket can still open.
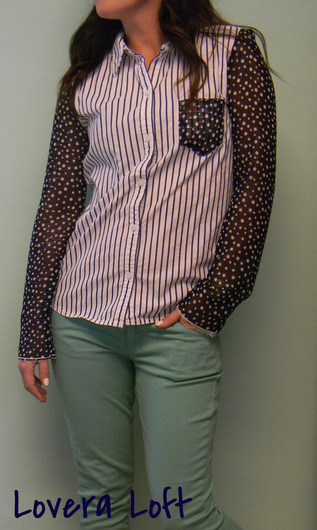
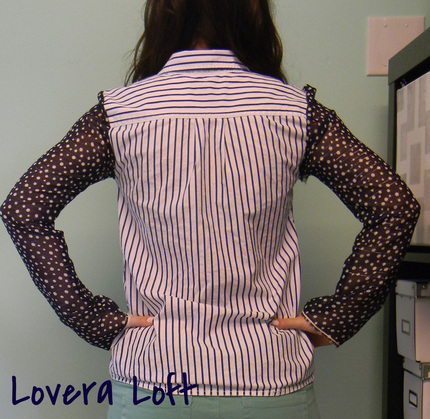
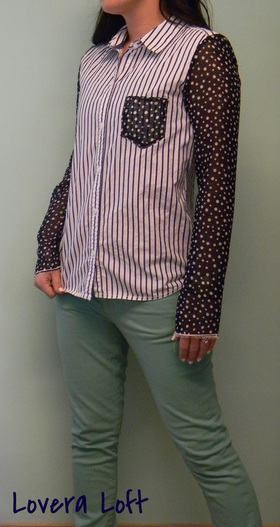
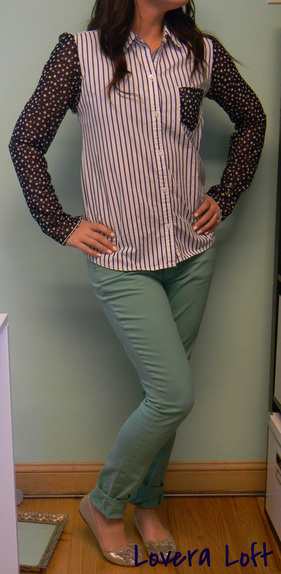
Then you are done!!
I am proud of how it turned out and mostly because it was born out of creativity and not copy! Thank you dress form for allowing me the ability to drape and imagine! And, I suppose, Project Runway and Fashion Star have to get some of the inspirational credit as well :)
I am proud of how it turned out and mostly because it was born out of creativity and not copy! Thank you dress form for allowing me the ability to drape and imagine! And, I suppose, Project Runway and Fashion Star have to get some of the inspirational credit as well :)

 RSS Feed