Lovera Loft
Follow me!
  • Home
  • Blog
    • Knitting
    • Crafting
    • Painting
    • Wedding
  • Etsy Store

Outdated Capris to Trendy Ankle PantsĀ 

11/8/2012

2 Comments

 
Picture
OK, this is going to be a quick post because I think I spent about 2+ hours working on that picture above. I know, you are looking at it thinking, "Really?!!" It's nothing special, I just was putzing around on the Sketchbook app on the iPad and you know how that goes. "Oh, let me try this setting." "Oh, add another layer? I think I should do that." "Erase from one layer onto the layer underneath, yes please!" I ended up editing the last part of it in reliable, simple old Microsoft Paint. Hahah..........sad.

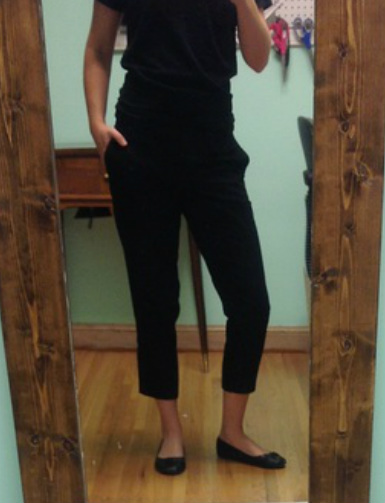
Here is how I turned some old outdated capri pants into some trendy skinny ankle pants. I am so glad these pants have gotten removed from the "donate" box six times in hopes of reviving them! :)

Materials:
-pair of long capris
-sewing machine
-matching thread
-pins

Tutorial:

Picture
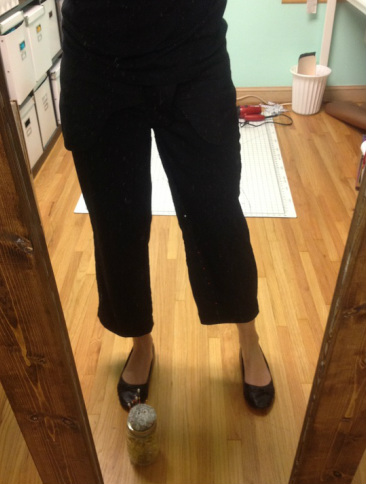
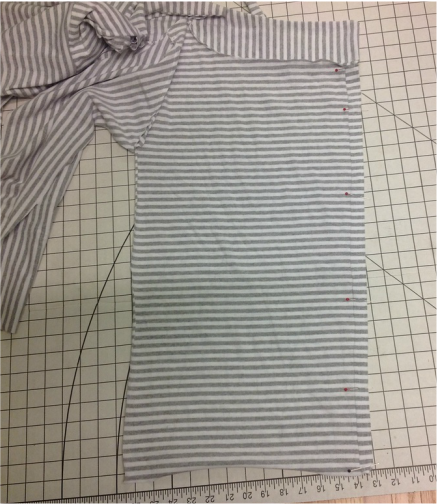
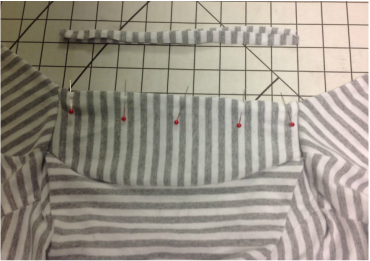
1. Put on the pants inside out. Pin the inside of one leg with how skinny you want the pants to be. **Note, the pants will become tighter when you sit down, so be a little generous. ;-) Take pants of CAREFULLY and lay flat. Now here, the front and the back pieces of the pant leg were a little "off" probably because my junk in the trunk fills out the back of the pants more than the front? Not sure. But I started at the inside seam and flattened out the front and back legs and re-pinned. I am not sure if I should have done that, but I did and the pants turned out OK.

2. Sew up along your pinned line on the inside of your pant leg.
                 **Helpful Hint from my Momma: Never cut anything until you have tried it on!!

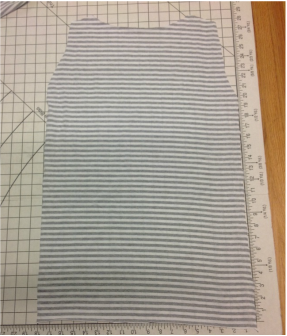
3. If the leg fits OK, trim excess fabric and if you want sew a zig-zag line on the fresh cut edge to keep it from fraying.

4. Repeat the process on the other leg and you are finished!
Picture
Picture
2 Comments

DIY Asymmetrical Button Sweatshirt

11/4/2012

7 Comments

 
Picture
Remember my first sweatshirt post that was sadly a gift....this one's for me!!  Yippee! I have been itching with creativity lately, all of my recent projects have been house projects, getting ready for hubby's 30th, which don't take as much creative thought as sewing crafts in my opinion. So when I agreed to pick up hubby & friends last night after a long day of college football I was actually excited to have a whole Saturday evening dedicated to uninterrupted craft time!  I love spending time with my boo, but sometimes I feel like I don't get as much done. It is so hard for me to say no, when he wants to walk the dogs with me, or run to Caribou, or clean the garage. I always say yes, and enjoy that time....but it is amazing how much I can accomplish when he is not around! ;-)

This sweatshirt was mostly inspired by the fabric. I found this grey & white stripe 4-way stretch sweatshirt material at Savers. A huge piece (probably about 3 yards) for $4.99! Score!!
Picture
I have had a couple of ideas of how to use the fabric, a bag is one idea. I had re-pinned this bag from teacher bud Sarah and I think I can figure out how to make something like this because I have made canvas tote bags (for all my bridesmaids!). But I think what I like most about this bag is the leather straps & zipper pull, which I don't currently have. I have found some online on Etsy, so once I pull the trigger and buy some, this will be the next project with the left over fabric!

Another idea for this grey stripey fabric was a long maxi skirt. I really like the coral one that I made, but I think this fabric was a little heavy. I would hate to have it be so heavy that it falls right off every time I have a student at school pulling on me and my clothes to get my attention! Being skirt-less is NOT a part of the private school uniform! ;-)

So I decided my best bet for this thrifty find was a sweatshirt. I had pinned an inspiration picture awhile back (again it was teacher bud Sarah, I owe you girl!)  This sweatshirt looked easy enough at first, but I ended up making mine a little differently in the end.


Picture
So this sweatshirt looked to me like maybe a back piece and two front pieces. The front pieces look about just as wide as the whole front. The neck is a cowl neck. I decided to use a sweatshirt pattern I had used for my other sweatshirts I have made. Now, I say "pattern", but really it was tissue paper pieces I traced from a sweatshirt I already owned---FREE pattern!  I used the back piece and the arms. For the front pieces I used the back piece, folded in half.  These directions are a little confusing, because I was a little confused the whole time I was sewing it. Lot's of trial & error, pinning while it was draped on my body, and lot's of staring and pondering! ;)

Materials:
- About 2 yards stretchy sweatshirt material
- Coordinating thread
- Sewing machine
- 2 buttons
- Needle (for hand sewing the buttons)
- Pins
- Scissors

Picture
Tutorial:

1. Cut a piece for the back. I cut the neckline a little higher than my pattern piece, I am not sure why it was so low on the pattern, but I am glad I cut it where I did. I think it helped hold the collar up in the back. 

Picture
2. Cut two front pieces. Somehow I lost this photo, sorry, but I laid my pattern piece folded in half on the fabric, but then extended about 7 inches out from the center fold and cut. This made my front piece with the extended flap (here out to the right).

3. Next I cut collar pieces two for each front piece and two for the back piece. I cut two for each because I wanted the collar to be thicker and stiffer. Each collar piece was 4 inches tall.


Picture
Here are the back collar pieces. Remember to cut two.  Again, 4 inches tall.

4. Now, another lost photo, I think this is where I sewed the collar pieces onto the body pieces. I first sewed right sides together along any sides of the collar that would be exposed. So, the top edges & the two front edges. Turn the collar pieces right sides out. Place collar pieces right sides together with where they will be on the body pieces. The curves will be opposite, so what I did is just start on one end, sew slowly, turning as I went.

Picture
4. Cut two arm pieces. If you want more explanation about how I made my sleeves, see my previous post. They are one piece each, with a fold at the top. I didn't bother hemming the cuffs, the fabric wasn't fraying, and I just wanted to finish! :)

Picture
5. Once the arms are sew to the bodices, then sew up the shoulder seams & the collar pieces. Third apology, no picture again. Your shoulder seams should line up with where the front collar piece meets the back collar piece.

6. Next, fold the front edges of the sweatshirt about an inch onto the wrong side of the fabric and hem. I sewed two straight stitches, one along the fold line, and one closer to the raw edge line. This helps it stay laying flat.

7. Place the front pieces right sides together with the back pieces. Sew up the side seams and underarms. Refer to my previous post for clarification.
Picture
8. I have to show you my mistakes, this is just one of many. However, it's a miracle that I have photographic evidence, usually I get so distracted on how to fix a mistake that I forget to document. :) So, who knows how this happened, but my back collar piece was about 1/2 inch taller than my front collar pieces?! Mmmm....?

Picture
I decided to simply snip off the top of the collar, turn the raw edges inside and top stitch. I then top stitched the whole collar to match. This helps it lay flat anyway ;-) No harm done!

9. Make button holes & sew on buttons and you're done! I put on my sweatshirt and played around with where I wanted the buttons. I think I might still add a small clip on the inside to keep the bottom front flap from sliding open, but it's not too bad, the fabric is a little sticky, so it stays in place fairly well.
Picture
Note: I did not hem the bottom or the sleeves. I might in the future, but for now it is fine, the fabric is not rolling to much or fraying. Just wanted it to be done!!

Sorry for this vague tutorial. Please comment if you have questions and I can try and help! It really wasn't that hard, so I encourage you to try, especially if you find some cheap fabric and don't have the pressure of ruining an expensive purchase! ;-) Notice the faux black skinny pants in the photo? They are my old figure skating leggings that I have had since high school!! So, my next project is to take one of the 5 pair of black work pants and turn them into skinny pants! Stay tuned!!
Picture
Picture
7 Comments

Easy Button-up Refashion

11/1/2012

7 Comments

 
Picture
This has been one of my favorite sewing projects lately, I have already made two, and have some backup shirts ready for more! I like this project, 1. because it uses Hubby's old button down shirts, so it's FREE,  2. because it takes very little thought/time... only five seams!!, and, 3. because it is long & a little baggy, so it is super comfortable to wear!  Hubby has so many button-down shirts that he passes them along to me when he is done loving them. I have tried a couple of other projects using his hand-me-down dress shirts...the halter top dress...fail....the wallet from the cuffs...cute, but too complicated....another fail! So when I came across this tutorial on Pinterest, I was a bit weary...but I am very glad I gave it a shot!
Picture
Materials:

1 Men's (or large women's) button-down shirt. (Side note-- this second attempt at this project is NOT made from Hubby's shirt....hah, this lovely flowery number is from the Goodwill!)

Tank top (to trace as a pattern--mine was a little baggy, however, since this will already have buttons you could make it more form fitting if you wish!)

Scissors

Pins

Sewing Machine/coordinating thread


Tutorial:
1. Lay the button-down shirt flat and place your tank top on top. Cut the up the sides leaving about a 1 inch for seam allowance. I wanted to leave the length where it was, which is nice, because one less hem to worry about!
Picture
2. Next, I folded down my coral tank top just to wear the lowest middle point was of the neckline. On my flower button-down shirt I made sure that this point was somewhere just above a button because I wanted a button to be at the top of my new shirt after I hemmed it.  I then cut from the shoulder seam down toward that low middle point and stopped. Then I folded the right side over the left to follow and cut the left side to match. Sorry if that is confusing. Basically just cutting the front neckline.
Picture
3. Cut off the back collar piece.
Picture
4. Next I hemmed the arm holes. I opened my shirt up completely and laid it upside down. I folded the arm holes in 2 times and pinned. This way no fraying edges will be exposed. Sew along the pinned armholes (both). 
Picture
5. Fold in (twice) and sew the neckline. The mistake I made on my first shirt was to sew one line across the whole front. This made it so that I could not unbutton the shirt completely. So this time I made sure to open it and sew from the BUTTON HOLE side all the way around the neckline to the BUTTON side.
Picture
6.  The last step is to sew up the side seams! Simple fold the shirt right sides together and sew from the armpit to the bottom on each side! Flip right side out and you are finished!!!
Picture
Picture
Picture
Picture
Miss Sis, does this motivate you to come over and make one of these?

Side note, I am starting to think of Christmas crafts...I know...but you know me and a deadline! So if you don't want to know what you are getting from me for Christmas, quit following until January :) Ha, kidding....please keep reading so that I have a reason to keep writing!
Picture
7 Comments

    Author

    I have self-diagnosed myself with Craft-Genre ADD.

    All projects are perfected using a "trial and error" method....enjoy!

    Archives

    July 2014
    June 2014
    March 2014
    February 2014
    December 2013
    November 2013
    October 2013
    September 2013
    July 2013
    June 2013
    May 2013
    April 2013
    March 2013
    February 2013
    January 2013
    December 2012
    November 2012
    October 2012
    June 2012
    April 2012
    March 2012
    February 2012
    January 2012
    December 2011
    November 2011
    December 2010
    November 2010

    Categories

    All
    Baby
    Bags
    Costumes
    Decorating
    Dresses
    Headbands
    Holidays
    Necklaces
    Ottomans
    Pillows
    Refashion
    Sewing
    Shirts
    Shorts
    Skirts
    Sweatshirts
    Upcycle

    RSS Feed


Powered by Create your own unique website with customizable templates.