Lovera Loft
Follow me!
  • Home
  • Blog
    • Knitting
    • Crafting
    • Painting
    • Wedding
  • Etsy Store

Seventies Screen Update: (See Mom, I knew I would do something with that screen I made you hold onto for 15 years!)

11/15/2012

2 Comments

 
Picture
Yet again, I do not know weather my motivation for not getting rid of something is nostalgic or cheap? When in cleaning mode, it is about 50/50 for if I am in a toss it mindset, dreaming of a clutter free clean minimalistic look, or if I am in a cheap/nostalgic mood. In the later, I tell myself, "Oh, I could do something with this... it would be cheaper to save this than throw it out and have to PERHAPS buy something similar in the future." Or, "But this was my Mother's screen and wouldn't it be special to have it in the house in some fashion and be able to some day in the future tell my children how it was Grandma's from a LONG time ago? ;-) ) It is ridiculous the things I come up with to convince myself not to get rid of something (please, no one call Hoarders quite yet...I still can see 90% of my floor in all rooms...OK so maybe 70% in the craft room at the moment due to two beautiful oak dinning room chairs from Alex's grandma...that are broken and waiting for a project...).

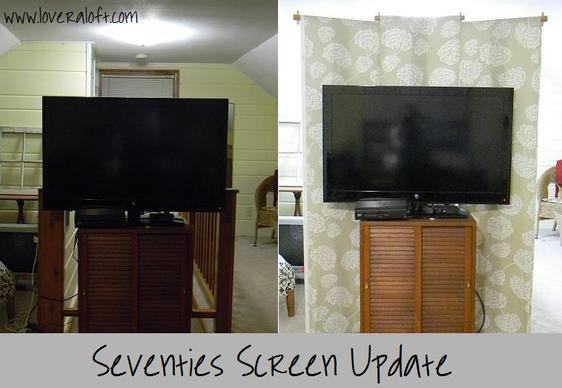
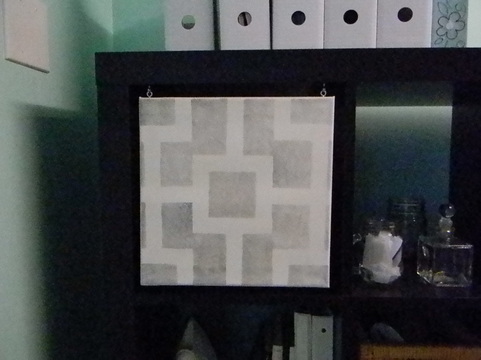
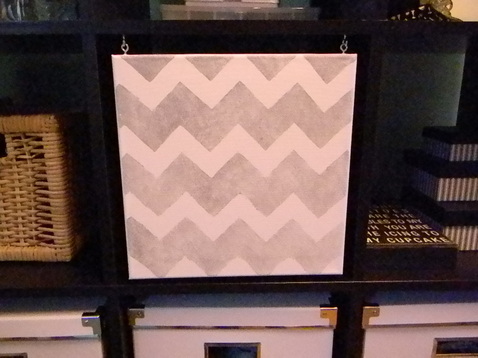
So the story behind this screen is that my Betty Crocker Momma has had this thing FOREVER! She covered it herself (judging by the fabric, in the seventies) and then it sat in our basement storage room from the eighties on. I can remember multiple cleaning sessions in which my mom was ready to part with the space hogging item but, I however, was not. I convinced her that I would love to have it someday when I had the space, so please keep it, pretty please?!  Well, now that Hubby and I have the space all of these items are coming back to haunt me!! So many projects...so little time!!

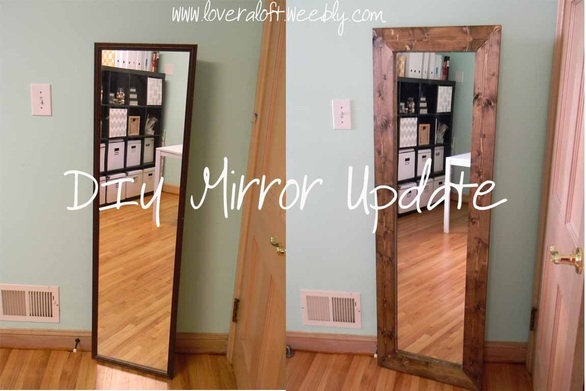
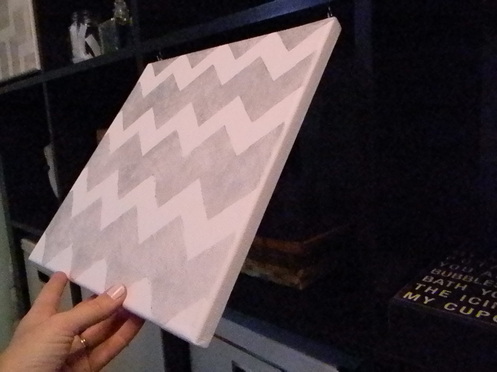
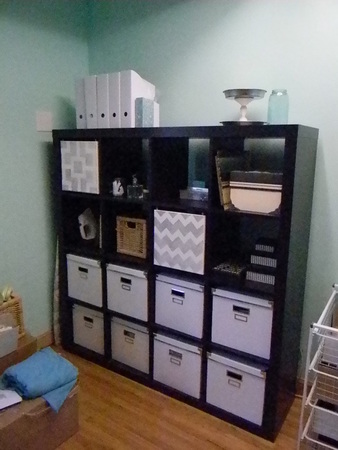
Luckily this screen ended up having the perfect spot in our new home. We have our master bedroom in the attic of our 1950's Cape Cod, it is a large open space that we love, however a little privacy was needed at the top of the stairs. The screen also helps to hide all of the cords coming from the back of the TV, discount double check....errr.... not the right phrase?.... double duty! (Side note, can anyone explain what that means..I laugh but don't understand.)
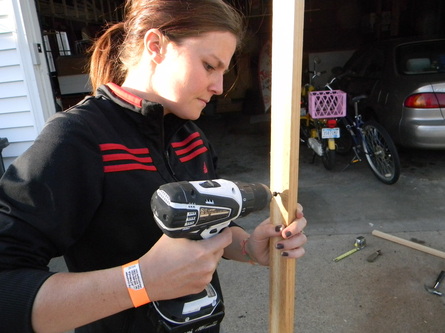
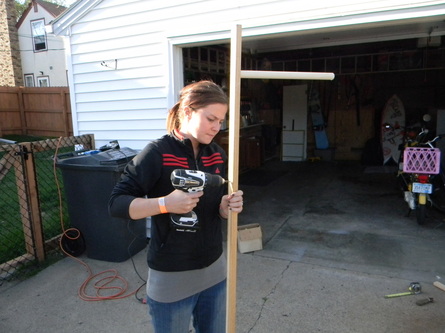
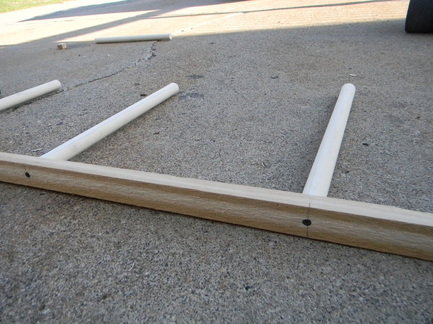
Tutorial:
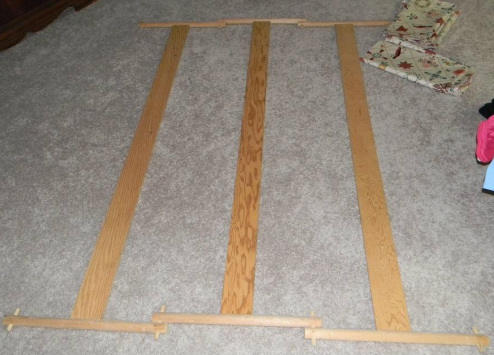
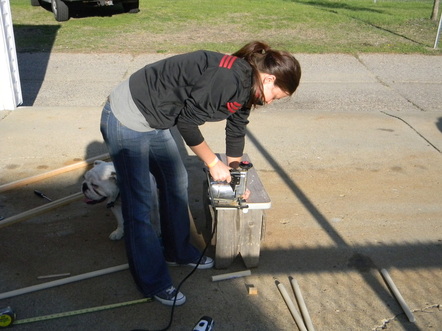
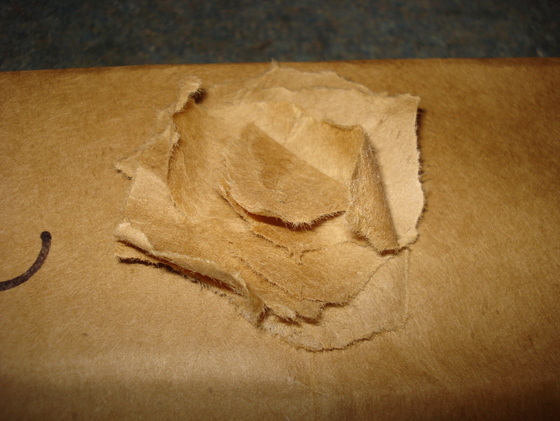
1. Take off the previous fabric using needle nose pliers and a flat head screwdriver.
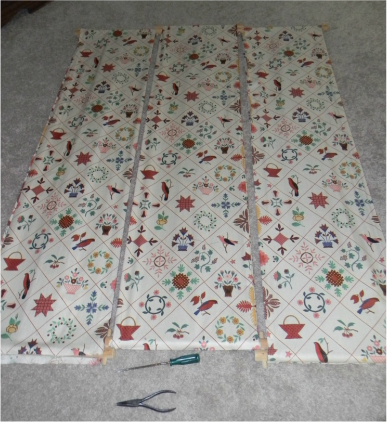
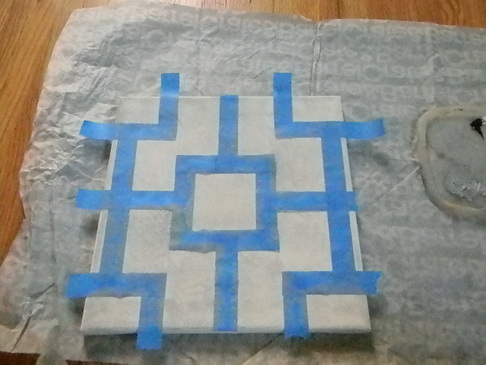
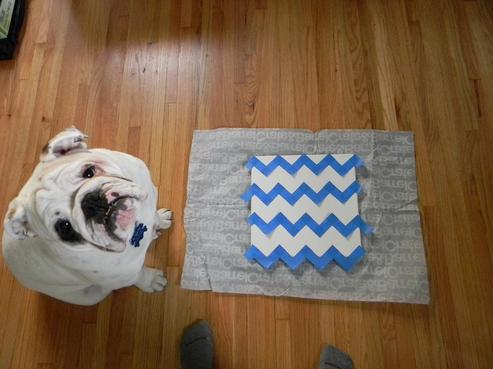
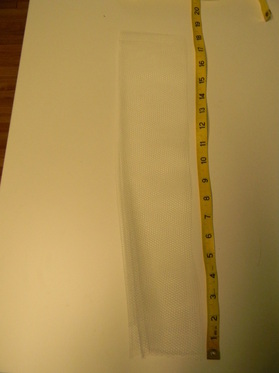
2. Use the previous fabric to cut panels of your new fabric.
3. Fold all of the edges of your new fabric under about an inch and press. This was instead of hemming. As long as you pull your fabric tight while you staple it back on, the folds should stay in place.
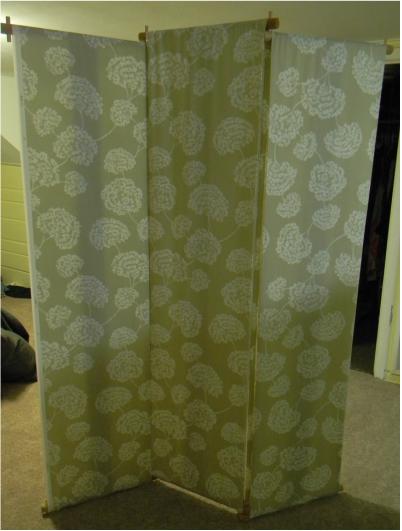
4. Wrap the fabric starting on the bottom of one side up over the top and finishing back on the bottom. Tuck edges Staple the fabric to the screen!
Picture
Picture
See the old seventies fabric folded up so nice and neat in the corner of the picture above? Yup, you guessed it......I SAVED IT?!! Ug, I might need help....Hoarders on speed dial anyone?
Picture
Side Note: This would not have been a cheap project if it weren't from my mom's awesome find at Unique Thrift Store. Occasionally you see bolts of fabric, which I am assuming are special order for someone and they either don't like it when it arrives, or more likely, never get to the project they had planned...I think this is a unique characteristic among most crafters.  Well, my mom saw this roll of fabric (which when I measured it was 11 yards!!!) at Unique and called me to ask if I was interested, I was, so she.........shhhhh........ kind of "hid" it behind a display until I could go back and purchase it on a 25% off VIP day. (Yes, I am a VIP at the thrift store..sigh..). It worked!! I found her hiding spot, and other than being covered in dust bunnies, it was perfect!!

So my mother is not only responsible for the frame of the screen, but the fabric as well!!  Discount double check!!! ;-)
Picture
2 Comments

Mirror Update

8/26/2012

3 Comments

 
Picture
Here is one of my summer projects that has been complete for a while, just haven't had time to share it!  The other projects will come soon, I promise. I am realizing that though I have more "time" in the summer, I actually accomplish WAY more during the school year when I have more "structure" to my days!  I shouldn't be too hard on myself, I did check off a few projects on my to-do list and I will be sure to post about them soon!

As far as this mirror update, I decided that seeing that ugly plastic framed mirror in all of my crafting photos was driving me crazy! I found this awesome tutorial at Shanty 2 Chic and followed it pretty exactly.  Here is the link to the tutorial:
                                        http://www.shanty-2-chic.com/2012/05/15-diy-mirror.html

Materials Needed:
Cheapo Mirror
1X4 wood boards
Miter Box & Saw
Staple Gun
Wood Glue
Wood Stain
Liquid Nails (paneling) & Caulk Gun

Basic Tutorial: (follow the link above for more details)
1. Remove cheap plastic frame from mirror. Mine was already falling off, so it was not difficult.
Picture
2. Cut your 1X4 boards at 45 degree angles using a miter box & saw. I actually started each cut with the box & hand saw but then completed each cut with my jigsaw (one of my favorite tools ever!). This just sped up the process. I have a pretty steady hand, but if you don't, I would stick with the box and saw for the whole cut.
Picture
3.  Spread some wood glue on the edges of these cuts to glue the frame together. **Note** Try not to get wood glue anywhere but in the seams. I was a little messy, and wherever wood glue had been, even after I wiped it off, the stain did not take. :(

4. Using a staple gun, staple the corner seams to help hold the frame together as it drys.
Picture
5. When the glue is dry, flip it over and stain!
Picture
6. The last step I do not have a picture of, sorry. When the stain is dry (next day), flip it over and run a thin line of liquid nails around the back of the frame on the edge closest to the inside. Then lay the mirror on top of the liquid nails and let dry. When I flipped it right side up I had some leakage from the liquid nails, however, it peeled right off the mirror when it was dry. Then you are done!
Picture
Picture
I can't wait to use this framing technique to make frames for pictures, or cork boards, chalkboards, etc! Any other ideas for this chunky wood frame?
Picture
3 Comments

Card Keeper

4/18/2012

6 Comments

 
Picture
In the world of creativity this is pretty low on the totem pole.... but with my love of organization, thought this was worth a small post. A while back, scrappy friend (scrapbooking) Angela and I went to one of those Friday night scrap nights at Archivers and I decided to spend the time making handmade cards. Scrappy friend Ang and I always have a good time giggling, eating and crafting together and we always enjoy leaving with a sense of accomplishment in multiple areas!! We have so many weddings, showers, and graduations coming up I wanted to have cards on hand, ready to go. But more importantly.... I am cheap! I can not stand paying $5 for a card at the store!! I usually use a 50% off Joanns coupon on the 25 pack of white blank cards + envelopes. I can't remember how much it ends up costing, but I think its like $10 after the coupon.

With all of my new cards I needed a special little place to keep them safe. I planned to use a cardboard photo box I had in my craft room, but turns out the cards I made a just are a little too tall for the box...of course! So I found this perfect little plastic organizer at Michaels this week for 50% off! It was $5.99! It has a flip lid and handy plastic separators to create different sections! I also got to use the label maker I borrowed from Momma :)
Picture
Picture
My new card keeper has its own little square in my Expedit shelving unit!! How cute!!
Picture
Next project is going to be a birthday calender/organizer. I am HORRIBLE at remembering birthdays and since facebook is fire-walled at school that doesn't help.  Gotta love the message I get when I try to check facebook at school, "This site is blocked. Please tell your teacher." Uhhhhhh what if I am the teacher, shit! ;-) Hahah

Picture
6 Comments

Ladder Love

4/8/2012

0 Comments

 
Picture
I have had a successful crafting weekend ending with this fun blanket ladder hubby and I made this afternoon! I will post about the other crafts soon, but here is how we made this shabby little ladder:

Materials:
1 12 foot cedar 1X2 board (cut in half)
1 dowel long enough to make 5 rungs (mine are each 15 inches long)
10 screws
Screw driver/Drill
Wood glue (optional)
White paint/paint brush
Sand paper
Picture
1. Mark where you want the rungs to go on the 1X2 cedar boards. Pre-drill small holes for your screws. Don't skip this step because it helps to prevent cracking & splintering your wood when you screw the screws in.
2. Cut your dowel for your rungs. I cut 5 pieces, each 15 inches long. We used a jigsaw. Yay, I love seeing a woman using power tools!! I look so strong & professional :)
Picture
3. Next screw your screws into the 1X2 boards on the outside just enough till you see the screw tip come through on the inside. If you want to put a little wood glue on the end of the dowel, now is the time. Then have a hottie hubby helper hold the end of the dowel up to the screw tip. Screw the screw the rest of the way into the dowel. We used a power drill to make sure it was super tight.
Picture
Picture
Picture
4. Once you have all of the dowels screwed into one side, repeat the process with the other 1X2.
Picture
Picture
5. To finish my ladder I wanted to distress it a bit so it looked less Home Depot-y and more Farm Barn-y :) So I hacked at it a bit with a hammer, and screw driver. I also had hottie hubby helper cut little pieces from an old rug with rubber backing to place on the bottom of the ladder to protect our wood floors and I nailed them in rubber side down to give it a little sticky and prevent slipping.
Picture
6. Lastly, I painted the ladder white and then sanded away in spots to create a weathered look!! Yay!
Picture
Picture
Picture
0 Comments

Shelf Door Art ~ Hiding clutter with style!

4/1/2012

0 Comments

 
With my sewing machine still out of commission I have no new crafts to post about!  So here is a quick post about some fun & functional "doors" I made for a shelf in my craft room. I got an Ikea expedit shelving unit from my mom and decided that all of the little cubbies were perfect storage for all of the fun creative trinkets going in my new sewing room! However, not all crafting supplies are as cute as I'd like them to be. I really didn't want to stare at the plastic Mod Podge bottles with the dried flacky glue dripping down the side. I'd like to quote a passage that really resignated with me from The Happiness Project by Gretchen Rubin about organizing in relation to happiness:
                    "...it was more satisfying when each item went in a highly specific location. One of life's pleasures  is to return                         something to its proper place; putting the shoe polish on the second shelf in the linen closet gave me the archer's                     satisfaction of hitting a mark."
Um yes, I share the same elation when I get to put something in its special spot, or in the perfect size container! Crazy, but that contributes to my happiness. Now, do I teach the hubby to share this same passion, or admit that will never happen... ;-)

Needless to say I was very excited to have the shelving unit with 12 small separate storage spaces... one for glue, one for ribbon, etc.!! But like I said, some things I didn't want to necessarily see on a daily basis. Baskets were an option...but baskets are expensive and they attract dumping. Ikea sells drawers that fit the squares but those also would not fit into my miniscule budget I had set for myself for this craft room makeover. I turned to one of the very first blogs I ever fell in love with, ikeahacker.net and found my solution:
Picture
Yay!! Two of my favorite things harmonizing together: (1) Art & (2) Organization! And it was very easy and inexpensive.

Materials:
12 X 12 canvases from Michaels (came in a 2 pack and I used a 40% coupon)
Hooks & Eyes from Home Depot (2 for each door) Make sure they are not longer than the thickness of the shelf.
Paint (or other mediums to decorate your canvases)

How To:
1. Measure where you want to screw the hooks into the top of the square you want the door on. I think it was about 1 inch from each side. I marked on a piece of painters tape. Screw in the hooks into the bookshelf.

2. Hold up the canvas to the hooks on the shelf and mark where the eyes will go on the canvas. Screw the eyes into the top of the canvas. 
Picture
3. Now it's time to have fun with the canvas! I painted mine with acrylic paint. I kept a simple pattern because the rest of the shelves might be full and busy so I wanted these doors to be more muted and calm. I simply put painters tape on the canvas in a design and then sponge painted on the grey. Poof done! I love how it turned out and only doing two was my way of being quirky and artistic.  
Picture
Picture
Picture
Picture
Picture
0 Comments

Tulle Tutu Tutorial

2/25/2012

7 Comments

 
Sorry, couldn't resist!! Not quite as bad as the "Sew hard to give away sweatshirt"  Hehe.

So the reason this post is under "crafting" is not because it was becoming a lonely category jealous of "sewing"....but because this is practically a no-sew tutu. The only sewing is 1 line on the elastic band, which perhaps could be done by hand.
Picture
Here is what you need:

Tulle:  I was lucky enough to inherit a bunch of tulle from my great aunt, June. June was a wedding planner at her church for centuries and when we were cleaning out her attic for her, you wouldn't believe the AWESOME left over wedding decorations she had accumulated...;-) I had to turn away many fake rose centerpieces and plastic table cloths....but I did glady take the mountain of white and pink tulle! 

Elastic: I measure my waist and then subtracted 3 inches. Cut this length.

Thread: To sew the elastic into a circle. I used a machine, but you might get away with strong hand sewing.

1. Take your elastic waistband and sew the 2 ends together to make a circle.

2. Cut your tulle into strips to the desired length of your skirt. Mine strips were about 4 inches wide by 36 inches long. The picture shows that I cut on the fold so the length is only 18 inches (half). I cut about 10 strips at a time so that I wouldn't cut too many.
Picture
3. Next, I slipped the elastic waistband around my legs so it wouldn't go anywhere.  Tie the strips of tulle onto the elastic waistband at the middle of the strip of tulle. Now, I am not sure if all tulle is kinda fragile, but if I pulled too tightly my strip would actually rip. Most likely this is because my tulle was hibernating in an attic for 30+ years...

Picture
Now, I wouldn't use tulle as bed sheets but look at Tator Tot!! I swear if I drop a Kleenex he would be like, "Yes, a bed!!" Ha

4. And....that's it!! Gotta love a 3 step tutorial!!! Now I am sure there is some dress up day at the Y that I can sport this at!! Yes... we wear tutus and other ridiculous get-ups while workin up a sweat!! Haha! My girls Jennie and Charlotte might own more tutus than tennis shoes! ;-)
Picture
Picture
Warning: if you finish your tutu when you are home alone on a Saturday night with a new techno playlist playing on your iPod....it miiiight lead to spontaneous silly dancing by yourself in you craft room.  No, I am not speaking from experience.

7 Comments

Mason Jar Love

12/11/2011

0 Comments

 
Being a teacher I love love love a great theme. So it is no surprise that I adopted a theme for our august wedding.... mason jars! I adore the farm, casual feel of a mason jar, and the versatility of them as well. On our wedding day they were prominent from holding flowers and candles on the tables, to a hand drawn stamp on the invitation and save the date postcards. So now the question is what to do with 100+ jars that are warming a spot on the floor in the basement of our cozy little home? My initial plan was to sell them on Craigslist and make a profit or at least my money back. But now that the money has left my wallet it's like it was never there, right? So, I have decided to use them for as many projects as I can before we part ways.  I have scoured the internet, pinterest particularly, and here are the first two of MANY mason jar projects to come!!!

1. Pin cushion/sewing storage (original link: prudentbaby )
Picture
2. Mason Jar Soap Dispenser (original link: Heather Bullard )

Picture
Picture
0 Comments

Cocktail Napkin Coasters

12/10/2010

2 Comments

 
I have to give credit to an amazingly crafty 4th grade teacher at my school, I stole this idea from her. This ends up to be a VERY inexpensive gift (once you have the finishing spray and cork--which will go a loooong way) :)  Leave it to teachers to always figure out the cheapest crafts!!

Picture
Materials needed:
Small porceline tiles (.14cents)
Cork contact paper ($10 a roll)
Glossy finishing spray ($8)
Paint brush
Scissors
Mod Podge
Fun cocktail napkins

Picture
1. Open up the napkin, cut apart into fours. (hopefully it is a napkin that has 4 images, rather than 2)
2. Mod Podge the napkin onto the tile, folding the edges and mod podging onto the back. I fold the corners like I'm wrapping a present. Putting a thick coat of Mod Podge over the top helps to give it a nice glossy finish.
3. Let dry (I lay on tinfoil)
4. Spray with finishing spray, let dry again. (FYI, the spray in the photo below didn't give a very glossy finish so I used Kryon Crystal Clear Acrylic Coating 1303 Spray instead)
5. Cut squares of cork the size of your tiles. Peel off backing paper and stick to the underside of the tile coaster.
Picture
2 Comments

Fancy Bag Wrapping Paper

11/21/2010

0 Comments

 
Not that exciting, but worth remembering. It means a lot more when giving a handmade gift to wrap it in a recycled manner :)

I wrapped the gift in a reused box using a Target paper bag. The blank canvas is too tempting and I had to draw on it. I also ripped up small circles and taped them on top of each other to make a flower. 
Picture
Picture
0 Comments

Oldies: handmade cards & Christmas ornament

11/10/2010

0 Comments

 
Here are some pics from my phone (that's why they are so dark--sorry!) of a couple of old projects.

The cards were made for my mother and placed in a binder organized by months. I also addressed and stamped envelopes of her family/friends so her cards were all set to be sent!

The ornament was made for a friend, her husband and newborn little boy. I used chipboard gingerbread men cutouts, painted them and hung from twisted wire.

Picture
Picture
0 Comments

    Author

    I have self-diagnosed myself with Craft-Genre ADD.

    All projects are perfected using a "trial and error" method....enjoy!

    Archives

    November 2012
    August 2012
    April 2012
    February 2012
    December 2011
    December 2010
    November 2010

    Categories

    All
    Art
    Mason Jar
    Organization
    Painting
    Sewing
    Skirts

    RSS Feed


Powered by Create your own unique website with customizable templates.