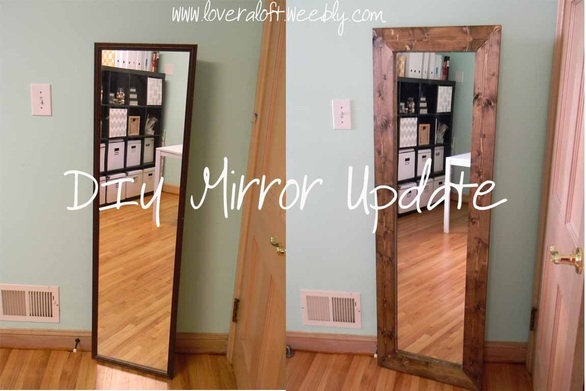
Here is one of my summer projects that has been complete for a while, just haven't had time to share it! The other projects will come soon, I promise. I am realizing that though I have more "time" in the summer, I actually accomplish WAY more during the school year when I have more "structure" to my days! I shouldn't be too hard on myself, I did check off a few projects on my to-do list and I will be sure to post about them soon!
As far as this mirror update, I decided that seeing that ugly plastic framed mirror in all of my crafting photos was driving me crazy! I found this awesome tutorial at Shanty 2 Chic and followed it pretty exactly. Here is the link to the tutorial:
http://www.shanty-2-chic.com/2012/05/15-diy-mirror.html
Materials Needed:
Cheapo Mirror
1X4 wood boards
Miter Box & Saw
Staple Gun
Wood Glue
Wood Stain
Liquid Nails (paneling) & Caulk Gun
Basic Tutorial: (follow the link above for more details)
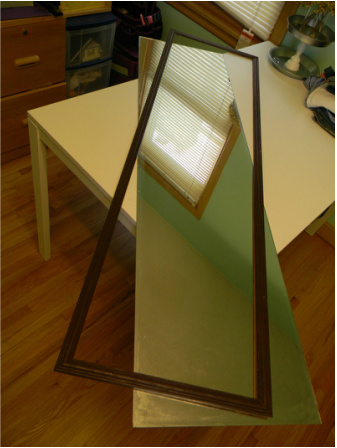
1. Remove cheap plastic frame from mirror. Mine was already falling off, so it was not difficult.
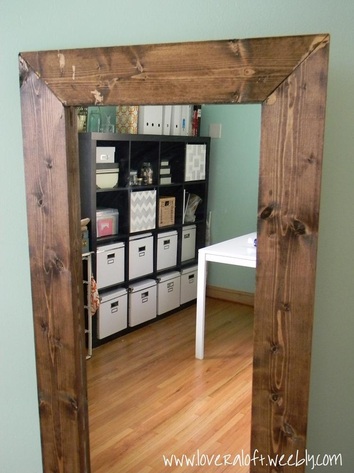
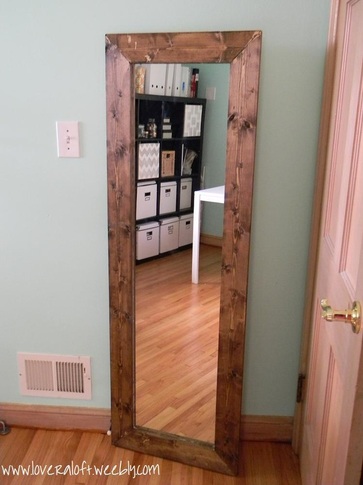
As far as this mirror update, I decided that seeing that ugly plastic framed mirror in all of my crafting photos was driving me crazy! I found this awesome tutorial at Shanty 2 Chic and followed it pretty exactly. Here is the link to the tutorial:
http://www.shanty-2-chic.com/2012/05/15-diy-mirror.html
Materials Needed:
Cheapo Mirror
1X4 wood boards
Miter Box & Saw
Staple Gun
Wood Glue
Wood Stain
Liquid Nails (paneling) & Caulk Gun
Basic Tutorial: (follow the link above for more details)
1. Remove cheap plastic frame from mirror. Mine was already falling off, so it was not difficult.
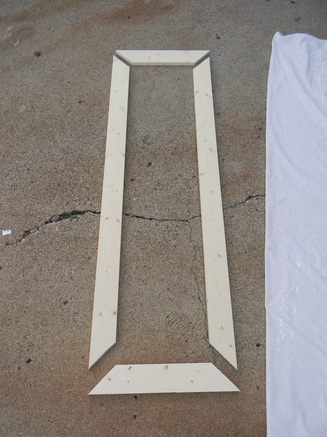
2. Cut your 1X4 boards at 45 degree angles using a miter box & saw. I actually started each cut with the box & hand saw but then completed each cut with my jigsaw (one of my favorite tools ever!). This just sped up the process. I have a pretty steady hand, but if you don't, I would stick with the box and saw for the whole cut.
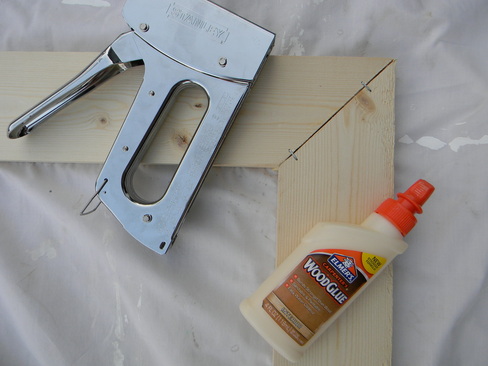
3. Spread some wood glue on the edges of these cuts to glue the frame together. **Note** Try not to get wood glue anywhere but in the seams. I was a little messy, and wherever wood glue had been, even after I wiped it off, the stain did not take. :(
4. Using a staple gun, staple the corner seams to help hold the frame together as it drys.
4. Using a staple gun, staple the corner seams to help hold the frame together as it drys.
5. When the glue is dry, flip it over and stain!

6. The last step I do not have a picture of, sorry. When the stain is dry (next day), flip it over and run a thin line of liquid nails around the back of the frame on the edge closest to the inside. Then lay the mirror on top of the liquid nails and let dry. When I flipped it right side up I had some leakage from the liquid nails, however, it peeled right off the mirror when it was dry. Then you are done!
I can't wait to use this framing technique to make frames for pictures, or cork boards, chalkboards, etc! Any other ideas for this chunky wood frame?

 RSS Feed